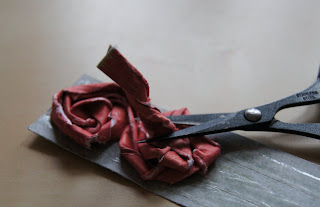
Here is my promised tutorial to make the paper rose ribbon you saw on my splash LO
If you are using cardstock as I am in this example then spritz it with a little bit of water - not too much (tho you can let it dry it you do over spritz) just enough to make it a little more malleable. If you are using paper, then you should be fine without.
pop some double sided tape on your backing piece - just do 2 strips - not 3 as in the picture!!
start twising your pieces of paper until you get some nice curls
do this to all your bits of paper
Start by placing the end of one of your strips on the backing paper and then curl the paper around to get the rose shape
Once you have done one rose, you can then loop the paper down to start on the next.
any paper you have left over you can snip off the end and then use it again later to fill in other bits of roses...keep going and adding more paper until you have filled your strip
I then added some glitter glue - mainly to hide the double sided tape that you could see, tho you could always cut the strip down more so just the roses show.
here are some close ups of the roses and glitter dolloping over the side - if only they were fairy cakes :)
Please let me know if you have a go at this as I would love to see it in action.


Pretty roses - thank you for sharing the 'how to'
ReplyDeleteIsn't it annoying when your washing gets wet - especially as the day started as a perfect drying day.
Toni :o)
Great tutorial thankyou so much, Will give it a go in the week,
ReplyDeleteH xx
Wow! Love these! TFS.
ReplyDeleteFantastic, that's a great tutorial, I'll definitely be giving it a go :D
ReplyDeletegreat idea!!! thanks for commenting on my blog
ReplyDeletethanks for sharing, i'll certainly give these paper roses a go x
ReplyDeleteoooh looking forward to having some time to make these x
ReplyDeletefantastic...thanks for sharing x
ReplyDeletethank you so much for sharing these, I'm going to give them a go, they're lovely
ReplyDeleteThanks so much for sharing! This is a really great tutorial! I have never made one of these, and now I am dying to try! You make it seem so easy. Thanks!
ReplyDeleteCute roses.
ReplyDeleteThanks for the tutorial
Wow, that's great! Thanks Kat. :D
ReplyDeleteWow! These are fab! I'll be having a go for sure!
ReplyDeleteSue x
very pretty, thanks for sharing the tutorial
ReplyDeletePretty roses - TFS.
ReplyDeleteLovely roses-straight to the top of my to do list!
ReplyDelete